Graduate Admissions Application Guide
Use our graduate admissions application guide for a seamless application process. Begin your journey toward a life-changing education centered on experiential learning and professional success.
/0x35:2400x1566/prod01/channel_34/media/seattle-university/admissions-amp-aid/how-to-apply/graduate-admissions/COEgradMITprogram_cjk_004.JPG)
Prepare to fill out the graduate admissions application with this step-by-step tutorial:
- Access application site and create login information
- Create application
- Application, Required Form(s) and Supplemental Documents
- Verify application
- Application fee and application submission
-
Step 1:
Access application site and create login information

If you are a returning applicant and have forgotten your password, click on the link at the login page.
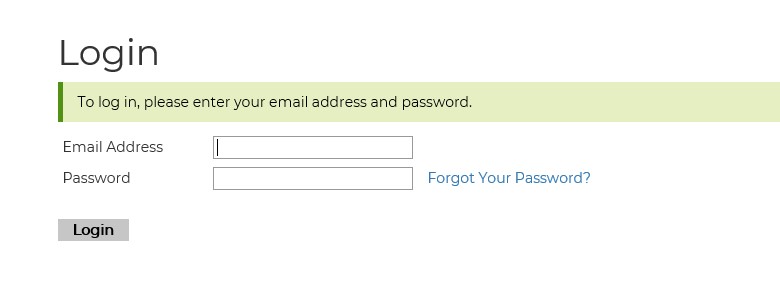
It will then have you verify your email address and birthdate. Once that has been verified, a temporary PIN will be sent to your email address. Be sure to also check your junk mail folder. The email will contain an Access Account link where you will need to enter the temporary PIN number provided. Once you have verified your information for security purposes (PIN number and birthdate required), you will be taken to a new page where you can reset your password.

-
Step 2:
Create an application
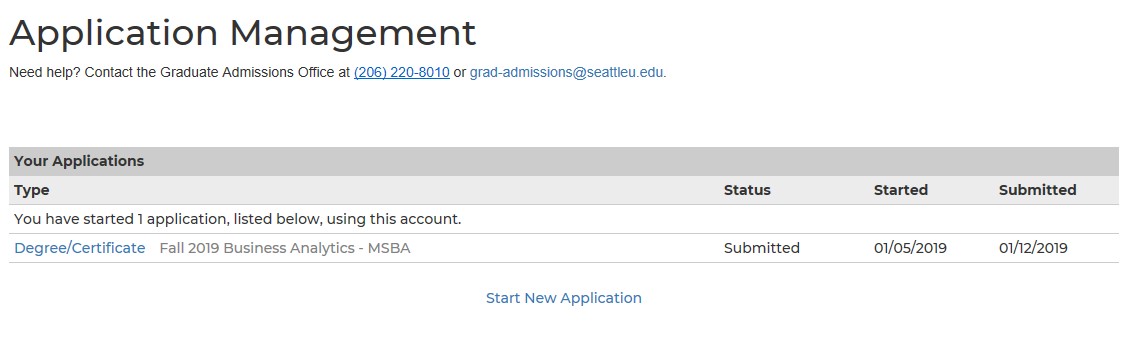
Once your login information has been established, you will click on the Start New Application option. If you are returning, you should be able to login and edit any application you have previously started. The “Start New Application” option will start an entirely new application. Clicking on “Degree/Certificate” shown below will return you to an in-progress application.
-
Step 3:
Fill in your application and required forms and upload all required supplemental documents
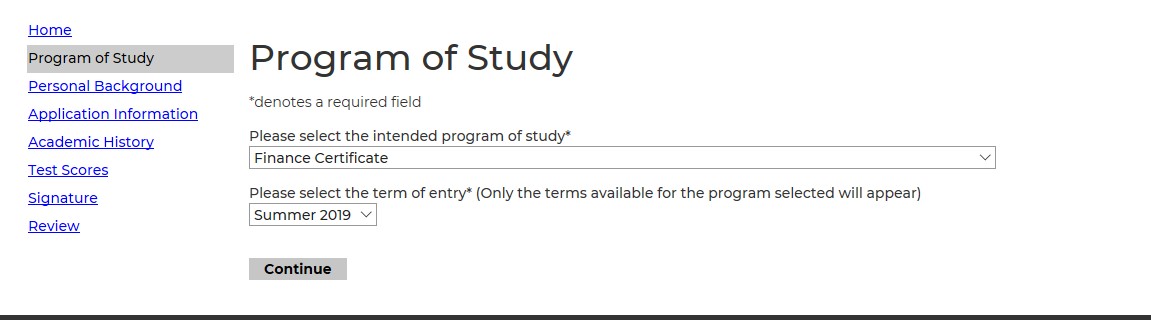
Only the terms available for the program you select will appear as options.
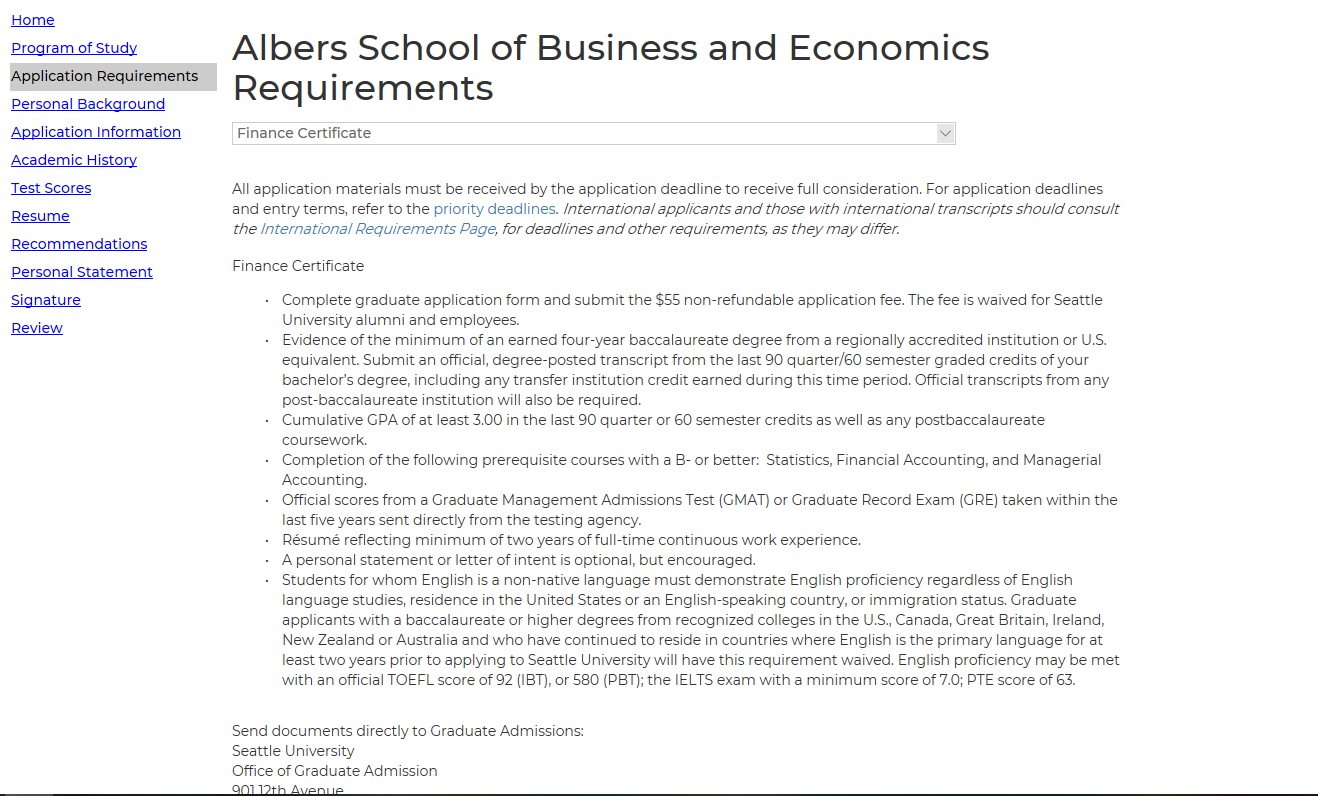
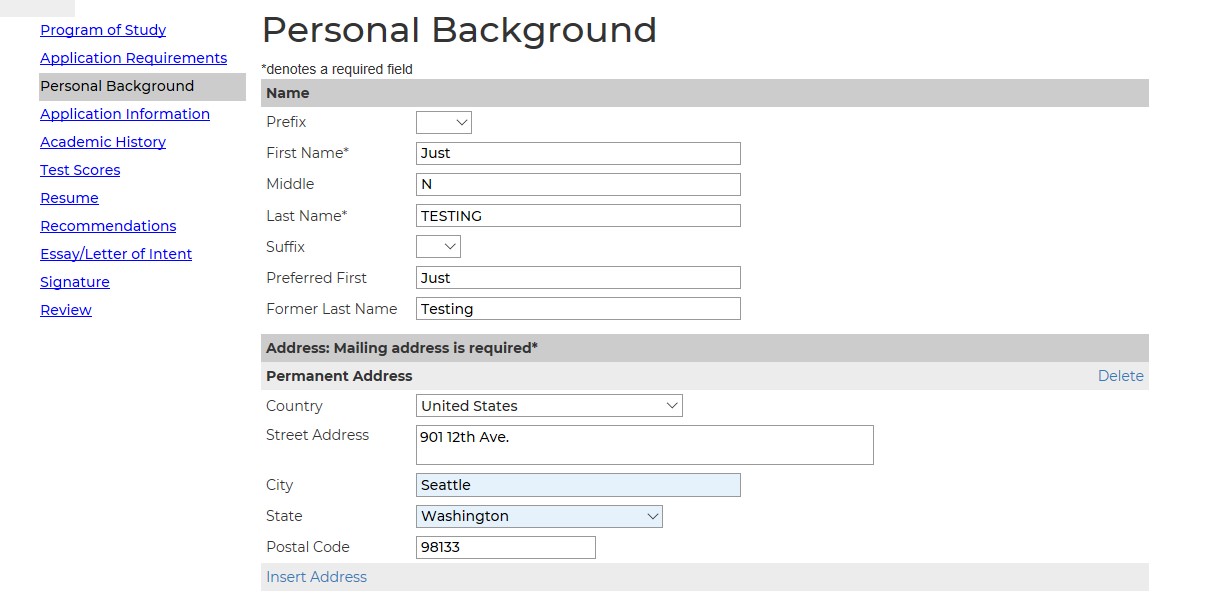
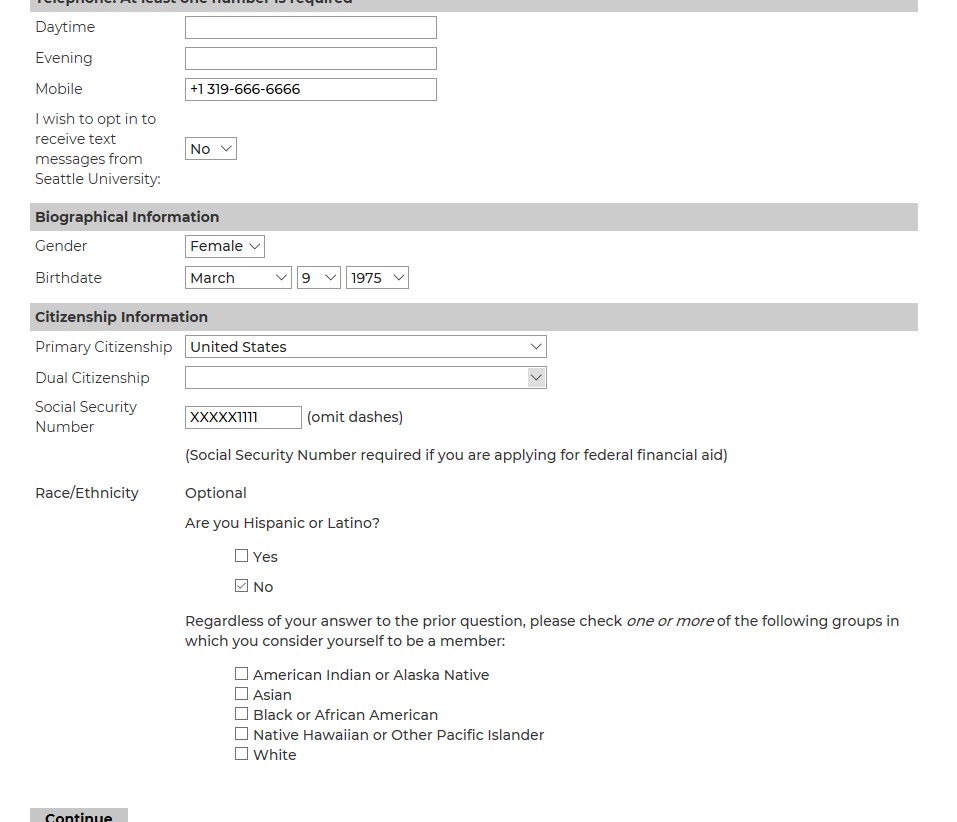
Application Requirements:
This screen shows you information about the specific program to help you complete the application. These details include information about required documents, restrictions and requirements for acceptance, and any contact information or addresses you need to send transcripts or other related documents.
Most graduate programs and certificates at Seattle University, especially within different schools and colleges, have different application requirements. Be sure to pay close attention to the sections listed in the left sidebar of the application interface so you don't miss any requirements.
From there, you may click into another section to continue filling in the application. Repeat the process of clicking into each section, finishing the required information, then submitting that information until your application is complete.
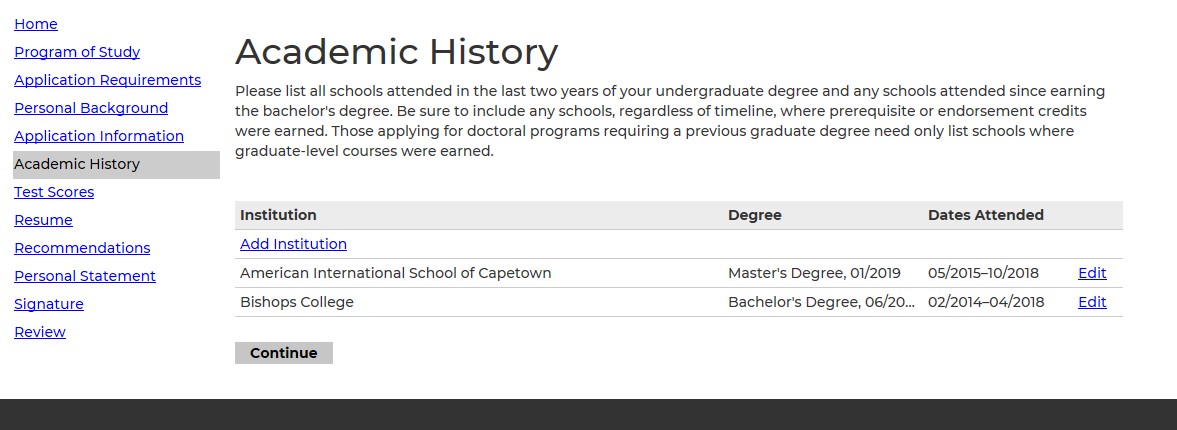
As stated above – include any schools where prerequisite or endorsement credits were earned. Those applying for doctoral programs requiring a previous graduate degree need only list schools where graduate-level courses were earned.
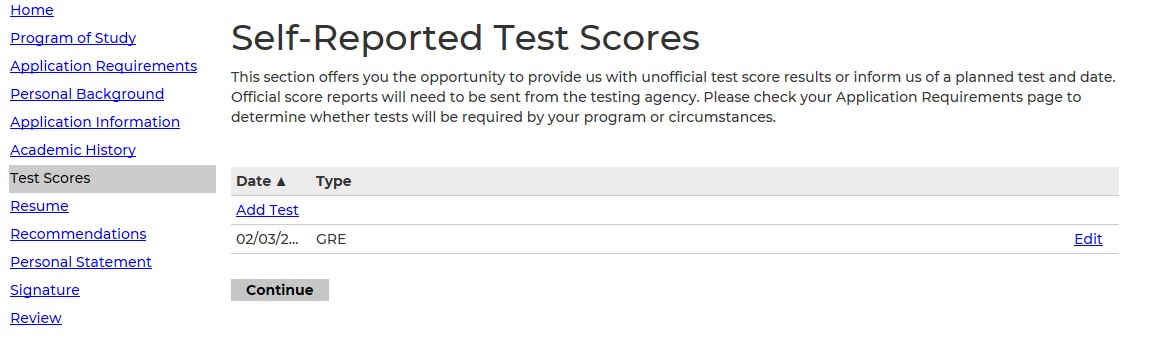
If you have test scores you would like to add, you can do so in the test scores section. A reminder that self-reported test scores are considered “unofficial,” and the official score reports will need to be sent from the testing agency. You can determine whether tests are required for your program under the application requirements section.
If the application will not accept your document and you have used an acceptable file type and size, please contact Graduate Admissions at grad-admissions@seattleu.edu.
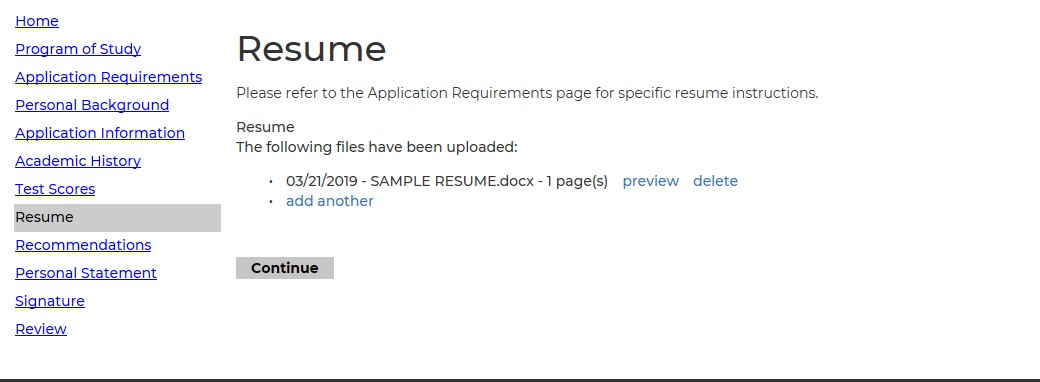
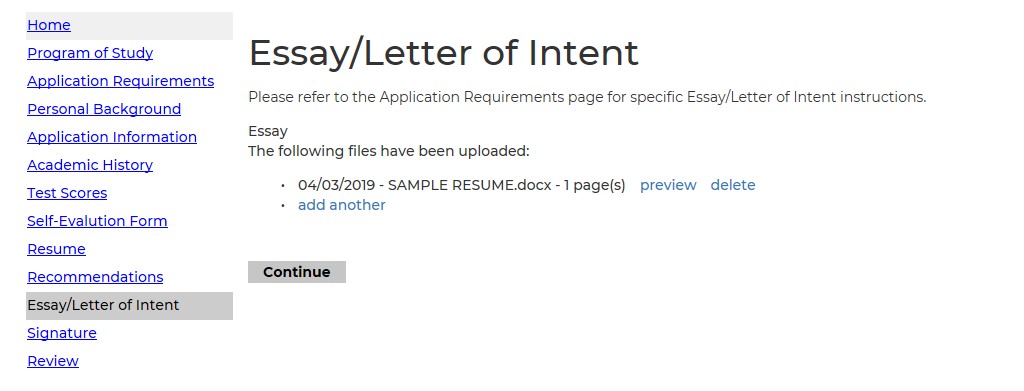
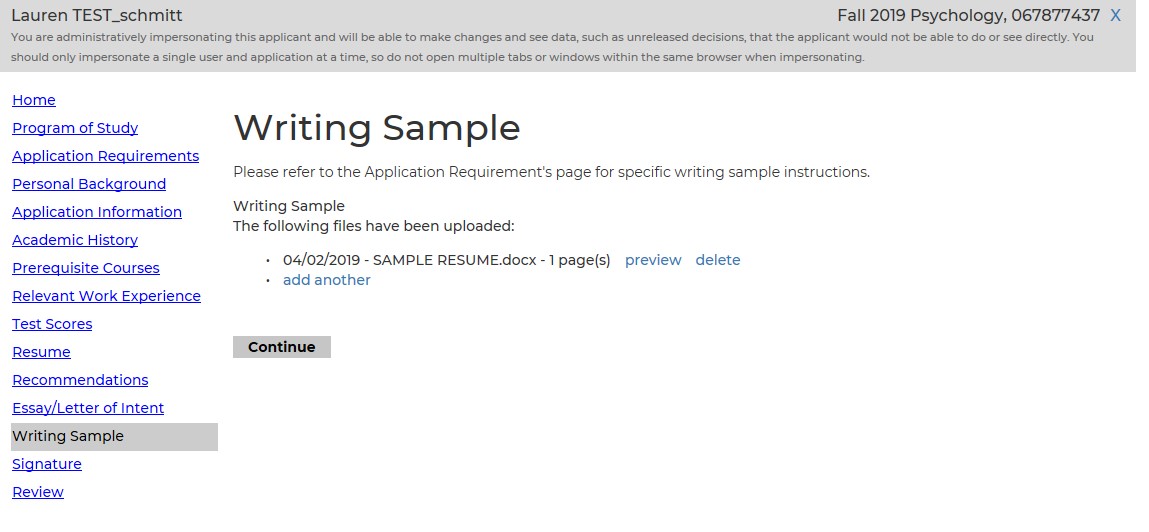
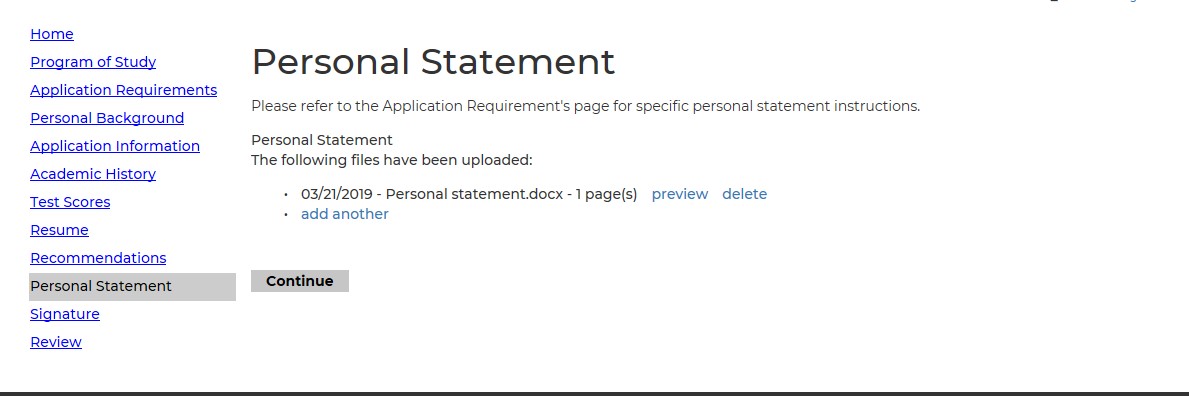
Any application with a required Essay/s will describe the requirements when you click on the section. After uploading your document, click “Continue.” As seen below, you have the option to preview your document, delete it or add another.
Most graduate applications and certificates also require two or three recommendations from an outside source.
Please have your recommenders’ information ready: full name, organization, position/title, relationship of recommender to applicant, phone number and email address.
It is very important to check beforehand the spelling of each recommender’s email address and that the email address is current. The recommender should receive an email immediately after you’ve clicked “Save” asking them to use a link to complete and submit a recommendation on your behalf for your intended program.
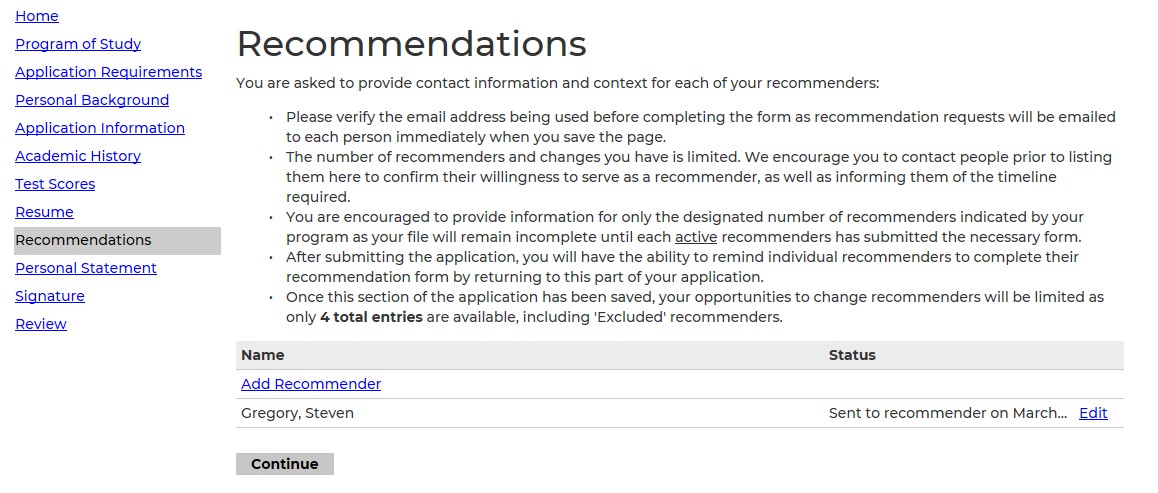
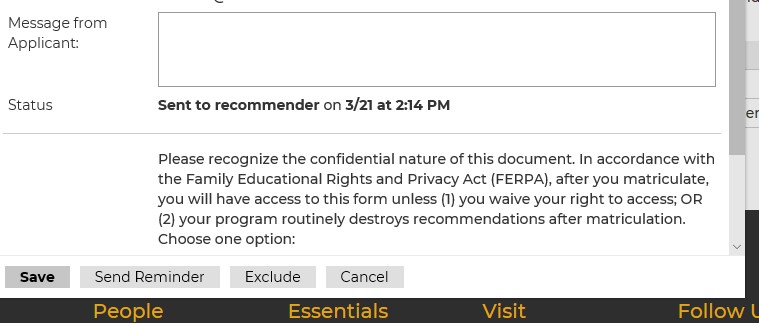
Once your application has been submitted, you do have the option to exclude a recommender or send them a reminder. You can get to this from the Recommendations tab and by clicking on the appropriate recommender’s name. If you choose to exclude them, that person will not show up as a requirement on your checklist. On this same page you should be able to edit the recommender’s information if needed.
On most applications, a personal statement is not required but encouraged.
-
Step 4:
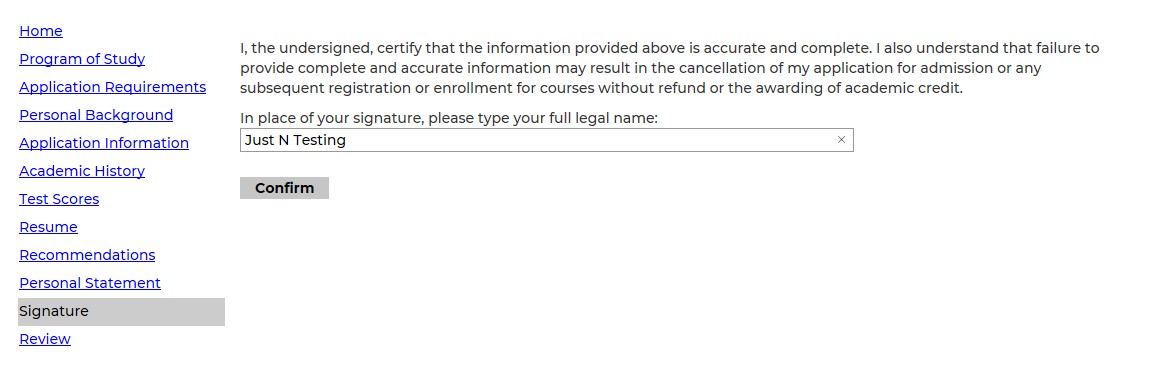
Verify your application (electronic signature)
-
Step 5:
Application submission
Seattle University graduate school applications have no application fee.
**Please be aware that you may submit the application before documents from outside sources are submitted, for example, recommendations, official exam scores, official transcripts, etc.**
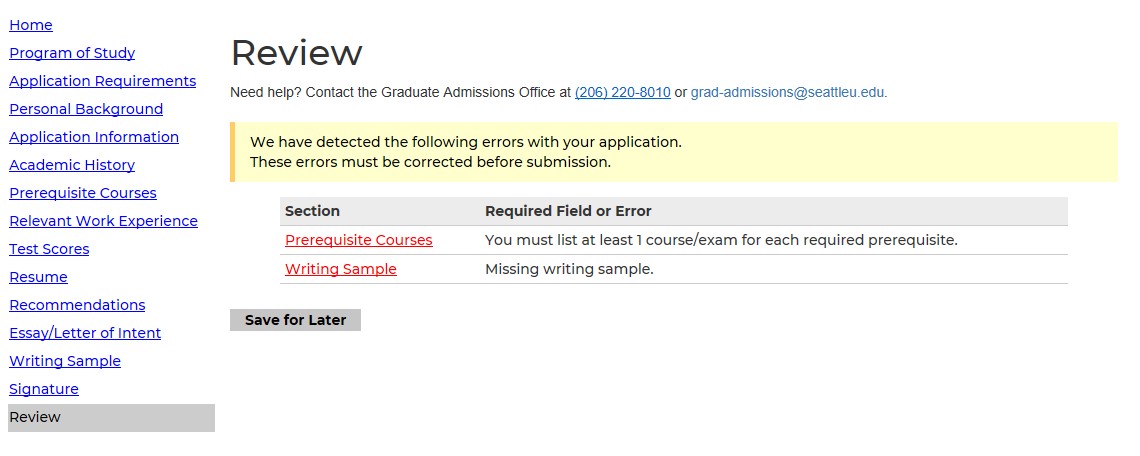
To complete your application and submit, the last two steps are to electronically sign the application and review it. The review tab should also alert you of any errors in your application which must be corrected before submission. After the errors are fixed, you should have the option to “Finalize Application”, which will submit your application. If you choose the “Save for Later” option, your application will not automatically be submitted.
After submitting your application, you will be directed to a status page. This will verify your application was successfully submitted. It will also show a checklist of documents required. A red X means they have not been received and a green check means we have them on file. You also have the option to upload additional materials near the bottom of the page.
Get in Touch
We’re here to help. For information about the Graduate Admissions Online Application, contact:
Admissions Office